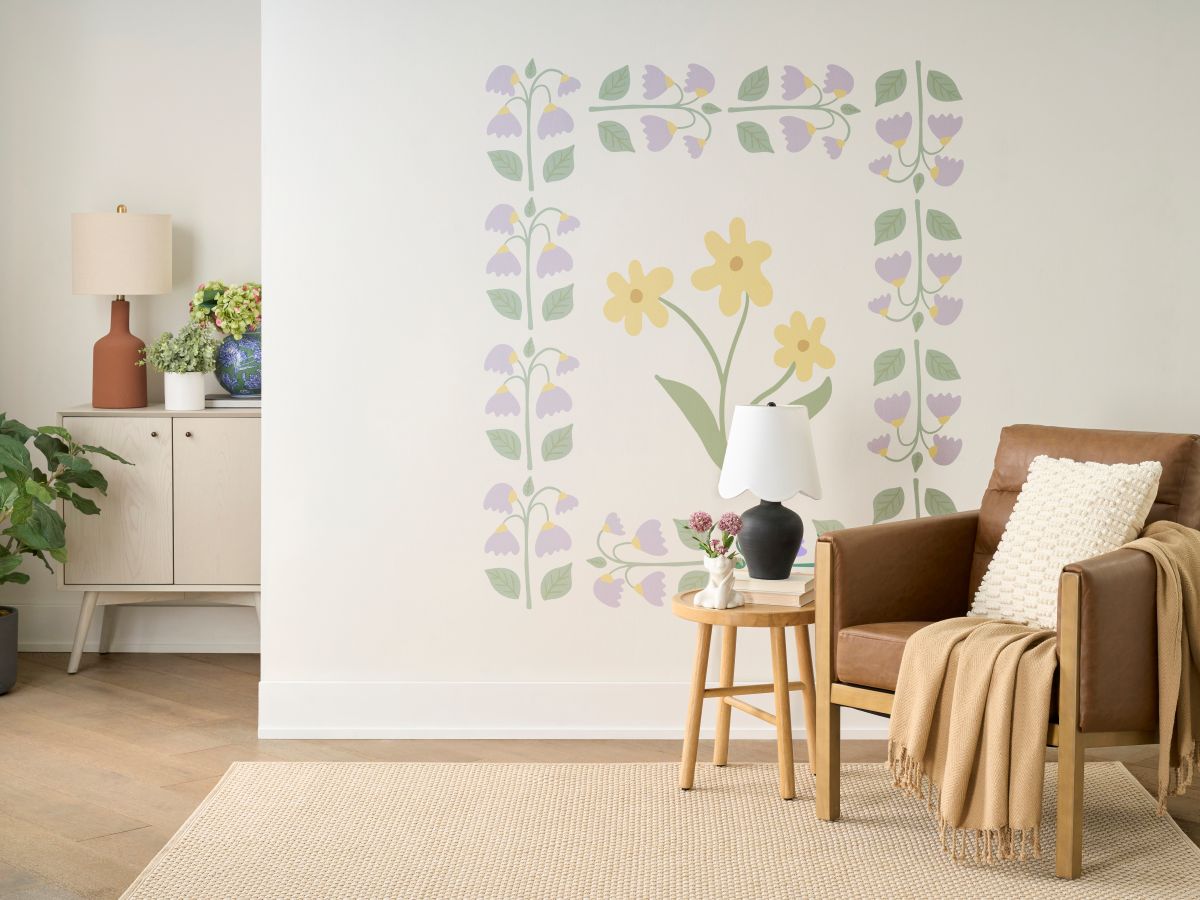
How to Make Your Own Stencil
Last updated on May 27th, 2025
Hand-painted wall accents have been all over our Pinterest feeds lately. But if you’re anything like us, chances are you’re not producing award-winning freehand art (and if you are, kudos!).
So, what’s the solution for those who aren’t? A DIY stencil! We sat down with Valencia, our marketing team’s resident DIYer, to walk through the process.
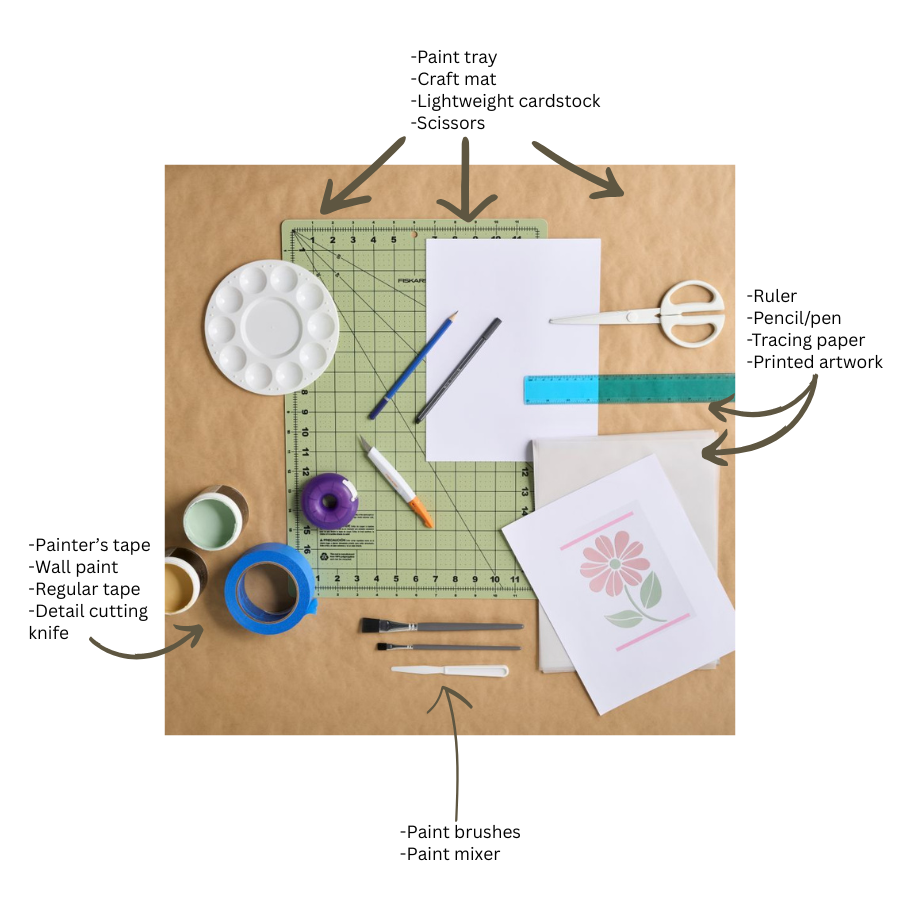
What you’ll need:
Step 1: Find or create your stencil art
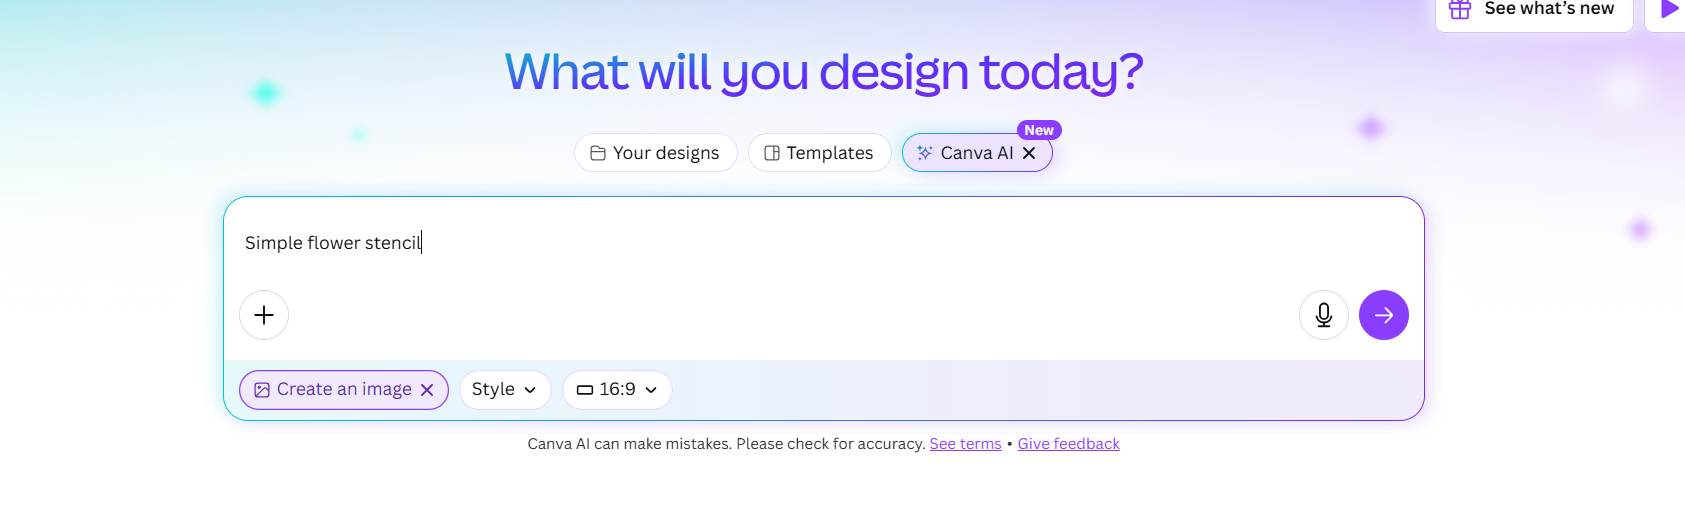
You can use a website that offers vector art (either free or paid) to find an image you like. I used Canva AI to make mine. Whatever your choice, the key is to pick something that’ll be easy to cut and paint later.
Step 2: Print the design
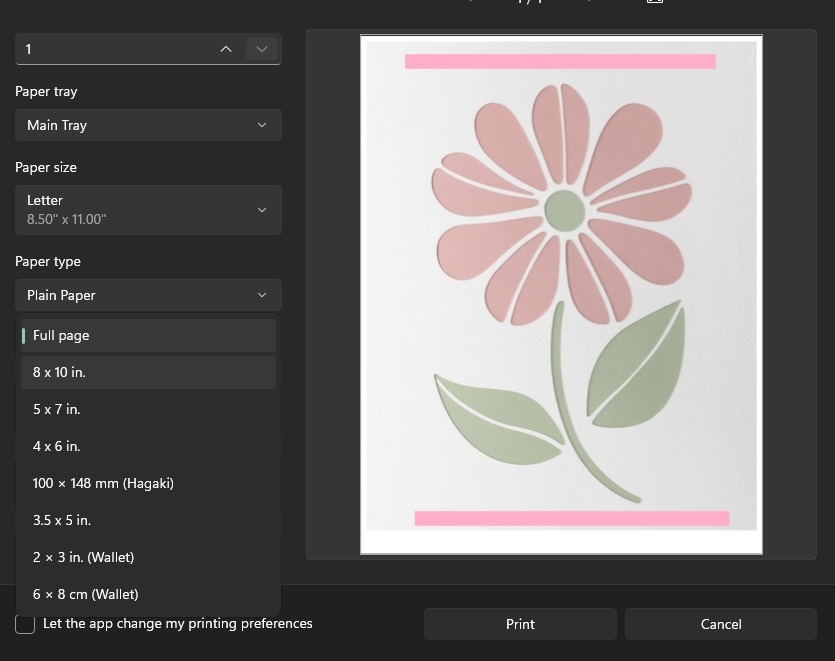
Before printing, measure the wall to determine what size you want your artwork to be. Most printers will let you choose the scale on the print preview screen; I went with 8×10.
Step 3: Trace the design on tracing paper
Use regular or double-sided tape to secure a sheet of tracing paper to the printout. Trace over the artwork, then carefully remove the tracing paper and stick it to the cardstock.
Step 4: Cut out the stencil
Use a detail knife and craft mat to carefully cut out the traced design. Take your time here, especially around curves! This step can take awhile depending on how complex your artwork is. Be careful to protect your fingers while you work.
Since my cardstock was larger than the art and tracing paper, I also took the opportunity to cut it down slightly during this step.
Step 5: Tape it to the wall
Remove the tracing paper from the stencil sheet and any last bits of cutout that are still stuck on the cardstock. Secure the finished stencil to the wall with painter’s tape. Make sure to smooth out the paper on the wall before you tape it down to keep paint from leaking underneath.
Step 6: Paint your design
Use a stencil or flat brush to lightly brush paint over the cutout portions of the stencil. Use a thin coat and build slowly to help avoid color bleeding.
Step 7: Carefully remove the stencil
Once the paint has dried enough, gently remove the stencil to reveal the finished design. Peel it back at an angle so you don’t accidentally ruin the art.
Step 8: Touch up as needed
If any of your paint managed to bleed through, use a cotton swab lightly dipped in alcohol to clean up the area. Just be careful not to apply too much pressure here. Rubbing alcohol can also affect the paint already on the wall.
With these steps in mind, you’ll have your own Pinterest-worthy design ready in no time!